Crochet Car Pattern
ch-chain stitch
sc-single crochet
sl st-slip stitch
st(s)- stitch(es)
trtr - triple treble crochet First of all i will tell you how to make a triple treble crochet( i hope u will not have problems with another sts) : Yarn over hook 4 times, insert hook in st yarn over, draw loop through ,(yarn over, draw through 2 loops on your hook) 5 time till you have 1 loop on the hook.
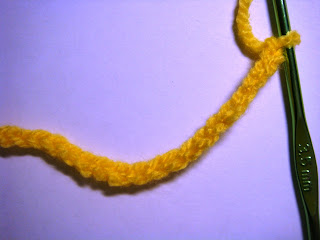
CaR : Row 1: Ch 18
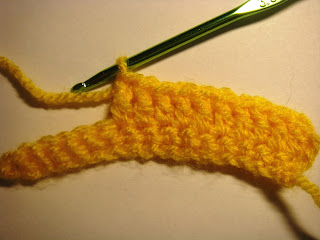
Row 2: sc in 2nd ch from hook and in each ch across, turn
Row 3: ch3, dc in each ch across, ch1,turn
Row 4-5: repeat row 2-3
Row 6: ch10, trtr into 6th dc, trtr into 7th dc, ch9, sl st into 11th dc, finish row with sc, don't fasten off
Sc in each st around whole car
Wheel: ch 5, sl st, ch3, 9 dc, sl st.
Car is ready just sew wheels and make headlights. Enjoy crocheting your version of the car! Here is the link for to a finished crochet bib pattern with car appliqué.
To follow my other projects - check my website with tons of free crocheting and knitting patterns.


This little car is so cute! Thank you for sharing the pattern! Will be checking your blog to see what other goodies you come up with!
ReplyDeleteCherie
you are welcome Cherie anytime
ReplyDeleteThank you for this design. I put a cat in the driver's seat. It is for a little boy undergoing chemo.
ReplyDeleteso cute! thanks for the pattern!!
ReplyDeleteHi, cute car. Thanks for the pattern. I am going to make this for my kid.
ReplyDeleteThanks for this nice pattern. Just now İ finished making this. Greetings from Turkey :)
ReplyDeletejust finish makin,mines i came out great.Nice pattern
ReplyDeleteLovely, thank you for sharing, your explanation is just great! Love you too. I'm going to make this for my kid :)
ReplyDeleteOh this was very cute, I`ll save it for later, thanks!
ReplyDeleteTorun
I love it! I made one!
ReplyDeleteThanks for sharing the pattern.
ReplyDeletelove it.... can not wait to make a couple of these ..
ReplyDeletereally like your blog... just too cute :)
ReplyDeleteThis is super cute just made one with head and tail lamps. Thanks for pattern.
ReplyDeleteWat leuk, bedankt voor het patroon1
ReplyDeleteTineke
bollies53.blogspot.com
Thank you. So cute.
ReplyDeleteI think you miswrote the instructions here:
ReplyDeleteRow 6: ch10, trtr into 6th ch, trtr into 7th ch, ch9, sl st into 11th ch, finish row with sc, don't fasten off
Should be...
Row 6: ch10, trtr into 6th DC, trtr into 7th DC, ch9, sl st into 11th DC, finish row with sc, don't fasten off
I made three of these to put on a baby hat. Supercute and supereasy pattern. Thanks! :^)
Just love yr pattern. I am going to try it. I am a novice crocheter but it is too cute not to try. Going to try & put it on a burp cloth. Tks for your pattern. Just adorable - great for baby boys.
ReplyDeleteI am a beginner crocheter but wanted to try your little car - have a couple of questions: 1) what crochet hook did u use? or does it make a difference. 2) when u say to sc around the whole car - does that mean across the top (roof part)of the car as well? or just the sides & bottom. A little help, please. It looks adorable when u do it. Tk u.
ReplyDeleteSorry for late respond I am sure you became professional in crocheting by this time, anyway I would like to answer your questions they might help for someone else. 1) Use 2.5 mm hook. 2) yes when I said around it means absolutely everywhere roof, sides, bottom.
DeleteThanks for idea very cute little car
ReplyDeleteThank you for your kindness and generousity for sharing this charming appliqué with us!
ReplyDeleteMerci beaucoup!
Thank you! I used your car on some charity squares for AIDS orphans in South Africa. They look so cheerful and cute, sure it will make them smile. My 8 year old thought it was pretty cool!
ReplyDeleteSue x
Thanx for the pattern. Im going to use it as a name applique. Put each letter of my nephews name on each car. And put them all together for him to have in his room. Again thanx sooo much!!
ReplyDeletewhat a beautiful blog!!! I can imagine you are a warm, colorful and beautiful person. Thanks for the pattern. I was looking for a little crochet car for a little hat that I made for a newborn.
ReplyDeleteI will try this.
God bless you
Hello lovely human
ReplyDeleteLike yeya I was looking for something on a boys hat, it's lovely.Thank you so much Ria
Thank you so much for sharing this cute car pattern. I just made two of them and they came out well.
ReplyDeleteHow stinking cute. I can not wait to make these
ReplyDeleteWhat headlights? dont't see on car.
ReplyDeletejust embroider them
DeleteThank you for the wonderful little car pattern. So cute. Please post some photos and patterns for animals if you have time!
ReplyDeletecheck this website I am going to post a lot of tutorials in future http://crazyhands.net/
Deletethank you for the pattern, it was easy to make, my only problem was that it was hard to read because of the way your site is, sorry, to many things floating around and with the pattern scrolling behind the flowers and stuff didn't go good
ReplyDeleteit is very nice please post JCB and tanker my kid likes it very much
ReplyDeleteHow do you attach car to blanket? With yarn or thread?
ReplyDeletesorry for late respond, As you wish just sew it
DeleteJust finished it.So cute,Im planning to use #10 fine thread for the next.Thanks a lot!Please check Row 6 instructions.
ReplyDeleteGreat car, just what I needed for baby applica. Thanks
ReplyDeletefrom Marilyn Moore [68yrs old]
Thank you for the pattern. Made it with cotton in pink for a bib. Girls drive too.
ReplyDeletethanks, enjoy and check my new tutorials http://crazyhands.net/
DeleteThank you!
ReplyDeleteThis comment has been removed by a blog administrator.
ReplyDeleteHi is the pattern in us terms or uk terms?
ReplyDeleteUs terms
DeleteHola! gracias por tan hermoso trabajo compartido. saludos desde Chile <3
ReplyDeletePositive site, where did u come up with the information on this posting?I have read a few of the articles on your website now, and I really like your style. Thanks a million and please keep up the effective work. Preventing Distracted driving
ReplyDeleteThanks, worked perfectly for me! I changed the wheels a bit, as I wanted them a tiny bit smaller - started with magic ring, chain 2, 9 dc directly in the ring, finish with sl st in the top loop of the first dc. Turned out beautifully😘
ReplyDeleteHi! Thank you very much for your pattern! I really like it! I wonder if I may use it for items I sell on my small norwegian shop? It will then be used on small crocheted baby balls. (It is a very small shop, I go to a couple of small markeds pr year, and I have an internet shop at http://fargerikedrommer.epla.no) It would be very kind of you to let me use it, but I will also understand if you would like it to be private used only. Looking forward to hearing from you! (If you would rather email me, you will find the contact ikon on my shop page.)
ReplyDeleteThis comment has been removed by a blog administrator.
ReplyDeleteThis comment has been removed by a blog administrator.
ReplyDeleteThis comment has been removed by a blog administrator.
ReplyDeleteI love the tent cover, just finished one for a young lady .I enjoyed making it. Thank you so much for sharing it.
ReplyDeleteGreat and I have a swell present: Who Does Renovations houses to renovation
ReplyDelete